Drawing a tow truck not only allows you to explore your creative side, but it’s also a valuable skill for various professionals, including local drivers, auto repair shops, property managers, and HOA administrators. As towing services often play a crucial role in maintaining safety and order, understanding how to depict these vehicles accurately can enhance communication and branding. This guide walks you through a detailed step-by-step process, understanding vehicle proportions, recognizing essential features, and exploring color theory—culminating in common mistakes to avoid. Each chapter aims to equip you with the insights needed to confidently bring your tow truck drawing to life.
null
null
Mass in Motion: Mastering Tow Truck Proportions for Realistic Drawings
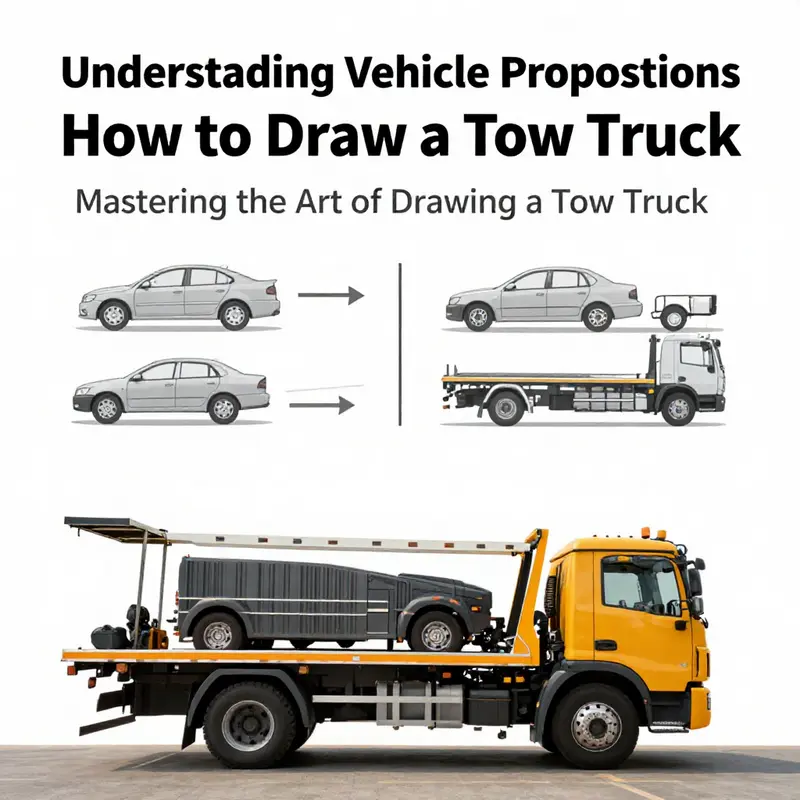
When you set out to draw a tow truck, you’re translating a working machine of substantial mass into lines and planes that communicate weight, reach, and purpose. Proportions are the invisible framework that makes a tow truck look believable on the page. If the chassis reads too short, the boom seems undersized; if the cab sits too high, the vehicle loses its grounded, heavy-duty presence. The goal isn’t just to recreate the surface silhouette but to capture the visual logic of a machine built for strength and precision. Start by letting the overall length and height establish a relationship to the wheelbase, because that span governs how much of the truck sits on the ground versus how much is suspended by the tow apparatus. Tow trucks are typically longer and lower than standard passenger cars. The front section houses the engine and the driver’s cab, while the rear is where the towing equipment—whether a hydraulic boom or a flatbed—extends, often elevated, reinforced to carry heavy loads. This arrangement isn’t arbitrary. It reflects a design that favors stability and maneuverability under demanding conditions, which is precisely what you want to convey in a drawing. The result should feel balanced, with the rear equipment clearly integrated into the chassis rather than tacked on as a separate appendage. In that sense, the boom design is the backbone of the composition. It should look like a natural extension of the truck’s frame, not a stray arm. A tow boom that seems to sit on top of the chassis undermines the sense of structural integrity. The best drawings make the boom appear as if it was built directly into the vehicle, reinforcing the idea that every line serves a purpose. When you plan the boom, think in terms of leverage, reach, and connection points. The arm should extend proportionally from the rear or side of the truck, and its angle should reflect the task at hand—lifting up and away or reaching outward to secure a vehicle. The base of the boom often hosts a winch mechanism, typically represented by a circular drum and the line or cable that winds from it. The relationship between the drum and the rest of the chassis matters; a drum that looks too small or too far from the frame disrupts the perceived functionality of the machine. In practice, this means paying attention to scale: the winch drum should be substantial enough to imply real lifting power, while still sitting within the geometry of the truck’s rear section. The silhouette of the vehicle is influenced by the towing method you depict. Wheel-lift tow trucks, for example, feature a metal yoke or fork that slides under one end of the vehicle being towed. This mechanism alters the truck’s outline in subtle but noticeable ways. If you choose a wheel-lift setup, the corresponding axle will appear slightly raised, and you’ll see the lifting mechanism projecting beneath the towed vehicle. The effect is not simply decorative; it communicates how the truck functions in the real world. In contrast, a flatbed tow truck presents a different silhouette altogether, with a longer, level surface that carries the vehicle atop the bed. Either choice should be reflected in your proportions so that the final drawing feels like a coherent machine rather than a composite of unrelated parts. Observing real-world references is essential. High-resolution photos from manufacturer sites or professional photography can reveal how the wheelbase proportions, cab height, and rear equipment interact in three-dimensional space. Technical diagrams and 3D models can help you measure relationships between the cab, the engine bay, and the towing apparatus. These references anchor your drawing in plausible proportions and give you confidence when you shift from a flat sketch to a more finished depiction. The interplay between the cab and the rear equipment also affects your shading and edge contrast. The cab tends to be rounded and compact, with a strong grille, bold headlights, and pronounced mirrors. The rear portion, by contrast, is more linear and angular—the lines of the boom, winch housing, and frame radiating power and purpose. When you translate these areas into form, consider the lighting and how shadows sculpt the volume of each element. The sides of the chassis will catch light differently from the more complex geometry of the boom and winch. Subtle shading under the vehicle emphasizes its grounded stance, while lighter tones on the upper surfaces convey the mass and mass distribution of a heavy-duty machine. Of course color choices can amplify the impression of scale and strength. Tow trucks are often rendered in bold, high-contrast schemes that emphasize their role as service machines. Realistic tones such as gray, yellow, red, or blue are common, and deliberate shading on the undercarriage and the lower edges of the chassis adds depth. The final touch is to ensure the overall weight balance feels right. If the front end is too heavy, the vehicle may seem front-biased and unstable; if the rear equipment dominates, the truck risks looking unwieldy. The midsection should anchor the vehicle in the scene, providing a stable hub from which the arm extends. As you refine, you may choose to refine the details that differentiate a wheel-lift from a flatbed at the level of proportion. The yoke and fork, for instance, should sit close to the wheels in wheel-lift models, creating a direct visual link between the vehicle being towed and the tow truck itself. The attachment points must align with the frame, reinforcing the sense that the boom is a functional part of the truck rather than a separate add-on. In the end, accuracy in proportions enhances not just the look but the narrative of your drawing. A tow truck is a tool, and the way its mass, reach, and balance are communicated on the page speaks to the builder’s understanding of how it works. Practicing with variations in wheelbase and boom angle can yield a family of believable tow-truck drawings, each story informed by the same core rules of proportion. For additional inspiration and visual references, you can explore the Santa Maria Tow Truck blog, which offers beginner-friendly insights and practical illustration tips that align with the approach described here. Santa Maria Tow Truck blog. If you want to deepen your study of how these machines are used in real life, considering the broader context of heavy-duty operations and emergency readiness can also sharpen your eye for proportion and function. A chapter on standardization in heavy-duty rescue operations, or materials on fleet safety and signaling practices, provides a broader frame that helps you understand why tow trucks are built the way they are. While the scope here is drawing, grounding your practice in a wider operational context can illuminate design choices that translate into more accurate renderings. As you continue your practice, keep returning to the core four anchors of proportion: the length and height relationship in the wheelbase, the integrated nature of the boom, the silhouette difference between cab and rear apparatus, and the weight distribution that underpins the truck’s stance. Each new sketch is an opportunity to test how these elements relate under different perspectives, loads, and angles. With time, your sketches will begin to convey the same robust reliability you see in the machines themselves. The craft of drawing a tow truck is, at its heart, a study in structural logic and visual balance. By honoring the way the chassis, cab, and tow apparatus fit together, you translate mechanical truth into art. Your drawings become not just a copy of a shape but a convincing portrayal of a machine that exists to respond to emergencies, recover stranded vehicles, and keep roads moving. The more accurately you render their proportions, the more your images will communicate those essential functions even to viewers who have never operated a tow truck. And in that clarity lies a satisfying reward for patience and careful observation.
Tow Truck in Focus: Rendering Essential Features and Realistic Details for a Heavy-Duty Recovery Sketch

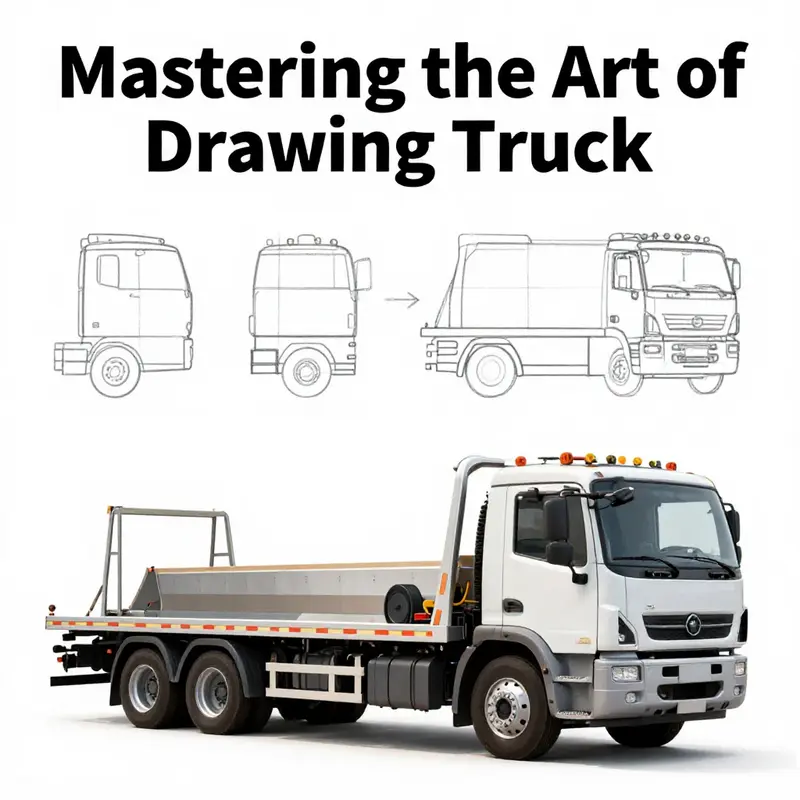
Drawing a tow truck is less about recreating a showroom ideal and more about translating a machine’s purpose into a confident, readable image. The vehicle is a moving toolkit, built for leverage, restraint, and careful筋 coordination during recovery operations. To capture that essence on paper, begin with a clear sense of the truck’s mass and the geometry of its proportions. Picture the chassis as a sturdy backbone, long and robust, supporting the complex hardware that will ride along and behind it. Start with two primary blocks: a compact, wide cab to house the driver, and a longer, heavier rectangular body that extends toward the rear where the recovery apparatus will anchor. The simplest way to read this machine in 2D is to break it down into basic shapes first, then layer in the mechanisms that give it its distinctive function. In practice, that means a long rectangle for the cab, a slightly longer one for the chassis, and a secondary, more intricate shape that will later host the boom, winch, and hooks. As the sketch begins to take form, keep a light hand on the pencil. Tow trucks convey strength, but strength should be legible rather than exaggerated. The goal is to evoke heft through proportional relationships, not by overemphasizing any single feature. The cab’s silhouette often communicates the vehicle’s personality: a bold front end with a pronounced grille, strong headlights, and a windshield that curves into a practical, work-ready profile. The front of a tow truck tends to be compact and assertive, designed to project authority and reliability. Carve in the essential elements—the windshield, side windows, mirrors, and the grille—with careful lines that suggest edges and planes rather than flat color. The shift from shape to detail should be gradual. A clean outline gives you a trustworthy base, while lighter interior lines suggest glass reflections, chrome trim, and the subtle contours that differentiate a modern cab from an older, more utilitarian design. The body behind the cab should present the chassis as a resilient platform. This is where the towing apparatus will attach, so the proportions must imply a strong, stable undercarriage and a defined area for the boom or bed. The eye tests composition almost instinctively. A well-balanced tow truck sits on relatively wide wheels, with ground clearance that hints at heavy-duty use. When you add tires, emphasize their weight by giving them depth and texture: thick treads, sidewall lines, and a subtle shine that hints at rubber and wear. The wheels themselves anchor the machine to the ground, ensuring the rest of the drawing remains believable. The next stage is the tow mechanism—the heart of the truck’s function. The boom, which may be integrated into the chassis in some designs or mounted as a rollable arm in others, is the most distinctive feature. It should extend from the back of the vehicle, angled upward or forward depending on whether it’s lifting or pulling. The boom’s geometry favors straight, bold lines with a hinge-like midsection to suggest articulation. At the base, draw a compact winch area: a circular drum, a taut cable, and perhaps a small motor housing. The cable should read as a flexible line with a slight thickness change as it approaches the drum, so viewers can feel its tangibility without getting tangled in an overworked swirl of wires. This is where the artist’s line work can truly communicate function. When you depict the winch system, think in terms of cycles: a drum that spools, a cable that pays out, and a hook that anchors to a load. The hook itself can be hinted at, rather than fully detailed, to avoid clutter while preserving the effect of a ready-to-work machine. The main frame behind the cab should also feature hydraulic lines and cylinders—subtle hints of power that reveal the vehicle’s capability without turning the drawing into a technical schematic. Draw hydraulic hoses as slender, slightly curved tubes running along the side of the truck and converging near the boom. Cylinders should have a simple, cylindrical form with a small piston seal line where the rod meets the cylinder head. These components are not merely decorative; they communicate the mechanism that actually lifts, tilts, and stabilizes loads. In this way, the drawing becomes a study in labor-efficient geometry rather than a static sculpture. A crucial pairing to consider is the integration of the boom with the truck’s structural lines. The boom should feel connected to the chassis, not suspended in air. To achieve this, align the boom’s base with a solid supporting member—perhaps a subframe or a reinforced rail within the chassis. The transition from fixed frame to articulated arm should be clean and mechanically plausible. If your goal is to convey a modern, remote-controlled or semi-autonomous design, you can push toward sleeker lines and minimal extraneous detailing. In contemporary models, you might see a more streamlined silhouette, smoother curves, and a compact control panel or interface hints on the cab’s roof. These touches convey modernity without sacrificing legibility. The rear portion of the truck—the area most often visible when the boom is in action—offers another opportunity to convey function through form. The bed or platform where loads are secured, plus the supports and braces that keep gear in place, should be drawn with a careful balance of simple shapes and decisive edges. Safety chains and tie-down provisions can be suggested through small, parallel lines along the bed, paired with tiny anchor points that imply a robust, purpose-built system. When choosing how to render the winch and lines, consider line weight. Heavier lines suggest solid metal components or cables under tension. Lighter lines can indicate hose, tubing, or cables that are less prominent but essential to the overall realism. The shading strategy should reinforce the sense of mass. Shade the lower planes more heavily to ground the vehicle, while saving lighter highlights for the top surfaces where light might strike. A gentle range of grays can provide volume without becoming muddy. If color is used, typical tow truck palettes lean toward bold, utilitarian tones—yellows, reds, blues, or grays. The color should serve the design’s story: a bright, high-visibility machine for roadside recovery, or a more muted, professional tone for fleet operations. Regardless of color, the shading and specular highlights will give the metal a sense of weight and the hydrualic system a sense of activity. Beyond the mechanics of drawing, there is value in observing real-world references as you develop your technique. Modern tow trucks come in a spectrum of configurations, and studying credible images helps you translate three-dimensional form into two-dimensional lines. If you’re seeking a practical reference point, a quick scan of instructional visuals can illuminate how professionals simplify complex machinery into readable shapes while preserving essential details. For readers who want to explore more visual material, the Santa Maria Tow Truck blog offers useful imagery and insights that can inform your approach as you build your own rendering. See the practical visuals in the Santa Maria Tow Truck Blog. Santa Maria Tow Truck Blog.
As you refine your drawing, keep the composition balanced. Consider perspective: a slight three-quarter view often works well for industrial vehicles because it reveals both the cab and the rear recovery hardware. A lower camera angle can amplify the machine’s heft, while a higher angle might emphasize the boom’s reach and the system’s complexity. Either choice should be supported by consistent perspective lines and careful attention to foreshortening, so the boom and cables don’t look like they are floating in space. The aim is to craft a credible narrative of a machine at work, not a perfect, unmoving study. To that end, you can think of your drawing as a moment captured in motion: the boom ready to lift, the cable taut, the hydraulics poised to respond to a command. This approach invites the viewer to imagine the precise sequence of actions that would occur if the truck were actually retrieving a vehicle. The drawing thus becomes a story of engineering in action, not merely a pedestrian vehicle study. The learning curve is steady, and progress comes from repeated, deliberate practice. Start with the general silhouette, then layer in the recovery apparatus, and only then fine-tune the details. Focus on the relationship between the cab and the drivetrain, the boom’s angle and length, and the cable’s path. The more you study the specific configurations of wheel-lift and rollback models, the better you’ll be at choosing the right lines and shapes to describe each system clearly. A wheel-lift model, with a yoke or fork sliding under a vehicle’s wheels, benefits from a slightly lower perspective that makes the front or rear axle appear anchored to the ground. For rollback designs, emphasize the tilting bed and the way the bed’s hinge integrates with the chassis. Even if you never draw every tiny hydraulic hose, you should map their presumed routes, so the drawing reads as a functioning recovery unit rather than a decorative machine. The act of drawing becomes a dialogue between form, function, and imagination, where accuracy is balanced by expressive line work. In time, your tow-truck sketches will carry a rhythm of their own: the bold, confident outline, the precise mechanical details, the delicate shading that hints at texture, and the occasional strategic simplification that keeps the image readable at a glance. The process rewards close observation, patient layering, and a willingness to revise lines to improve clarity. Whether you’re preparing a piece for a portfolio, a tutorial series, or a personal sketchbook, the essential features—robust chassis, the boom and winch, the hydraulic accents, and the heavy-duty wheel set—provide a sturdy backbone for your drawing. With practice, the tow truck becomes not just a vehicle to replicate, but a vessel that communicates power, purpose, and the quiet complexity of recovery work. For readers seeking broader context on equipment design and field practice, external resources offer deeper technical explorations that can inform your artistic decisions. External reference: Tow Truck Remote Control Guide: Performance, Technical Features, and Applications Explained.
Metallic Light: Mastering Color Theory to Bring a Tow Truck to Life
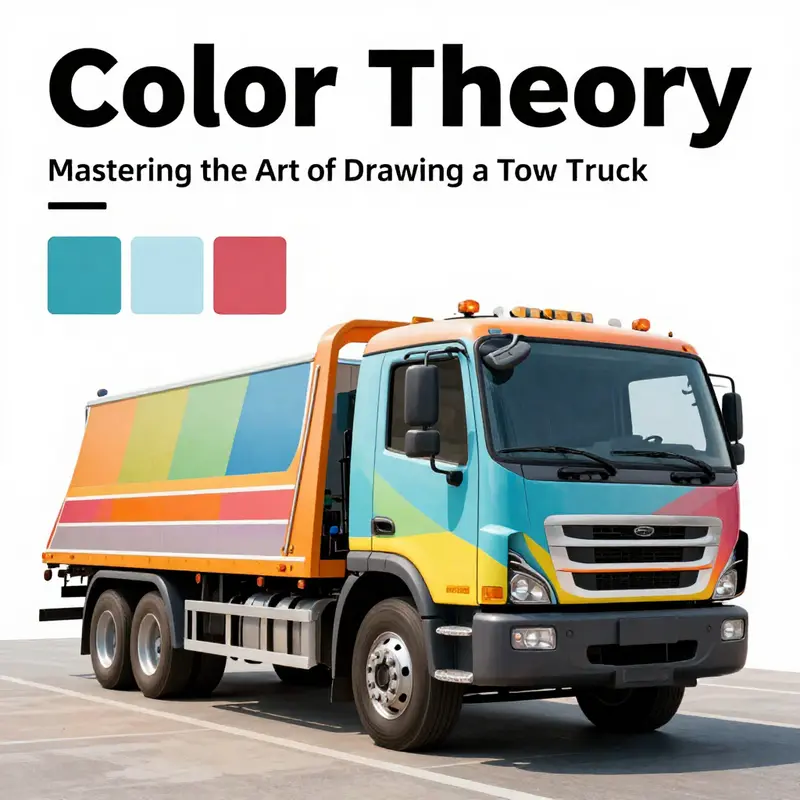
Color theory is the secret amplifier for a tow truck drawing. It is not only about choosing colors but about orchestrating light, texture, and mood so that a static sketch feels like a working machine under real conditions. When you approach color with intention, the tow truck you draw becomes more than a silhouette on paper; it becomes a tactile object that readers can almost touch, hear, and imagine moving. In this chapter, we’ll weave color theory into the practical steps of drawing, keeping a steady eye on how a vehicle’s metallic skin, heavy hardware, and warning signals interact with light. The result is a piece that reads as credible craft rather than a simple cartoon, while still remaining accessible to a learner who is navigating the basics of the form. As you move through the process, you’ll find that color choices can guide the viewer’s eye to the most important parts of the composition, such as the winch, the boom, and the rugged tread of the tires, without shouting at them through garish combinations. To ground the discussion, imagine a tow truck parked under a late afternoon sun, its chrome and heavy metal surfaces catching and throwing warm light while cooler shadows pool in the undercarriage and crevices. This mental image helps you translate color decisions into believable geometry and texture on the page. Begin with the base of the vehicle: the body and cab. Tow trucks are industrial behemoths, and their color vocabulary often centers on metallic neutrals—cool grays, steel blues, and charcoal blacks—that speak to their mechanical nature. A cool gray or blue-gray base works wonderfully because it reads as metal without competing with the brighter work components. If you choose a base that leans toward a blue or green undertone, it subtly communicates the reflectivity of a polished surface without becoming icy or lifeless. With this foundation, you can build a believable color field that remains versatile for shading and highlights. The next step is to introduce color temperature through limited, purposeful accents. Temperature is the emotional cue of color; it tells the viewer whether the scene feels crisp and modern or warm and bustling with activity. For a tow truck, a practical strategy is to keep the base in cool tones while applying warm accents to areas you want to emphasize, like the warning stripes, grab hooks, or the outline of the winch assembly. A bright yellow or orange stripe against a cool gray body instantly seizes attention, especially at a distance or in a busy scene where the truck might be responding to an emergency. This contrast, drawn from color theory, is a classic move: the complementary warmth of yellow or orange against a cool neutral creates a visual pop that remains legible even in a rough thumbnail sketch. Complementary colors are not about turning every surface into a carnival—rather, they function as targeted instruments. The tow arm, the boom, and the winch housing can be highlighted with accents of red or red-orange in a restrained, deliberate manner. When used sparingly, these warm hues serve to delineate the mechanism from the body mass and render the machinery’s functionality more readable. If you opt for red accents, balance is essential; too much red on a predominantly cool palette can overwhelm the composition and push the viewer’s eye away from the most crucial details. Instead, apply red in small percentages—perhaps a thin line along the edge of the boom or a small patch on the motor housing—so it signals crucial components without stealing the scene. The interplay between these warm elements and the cool body helps communicate the truck’s dual character: robust, industrial presence grounded in metallic truth, and precise, high-visibility equipment designed for safety and efficiency. Value is the quiet workhorse behind color theory. In drawing, “value” means how light or dark a color reads, independent of its hue. A tow truck has a broad spectrum of values—from the bright glare of chrome and reflective surfaces to the deep shadow tucked under the chassis. Start with a value study in grayscale, then translate those values into color. The lightest areas—bullnose bumper reflections, the top of the cab, the edges where light catches the chrome—should be treated as bright, almost white with a hint of color, to preserve the sense of reflective metal. The midtones give the body its dimension, while the darkest shadows anchor the undercarriage and the areas tucked away from direct light. As you paint, remember that color intensity shifts with light. Under a bright sun, the same gray can appear lighter and more saturated than under overcast skies. When painting, layer color in thinking terms: start with a cool hue that matches your base, then gradually introduce warmth for accents, and finally bring in darker tones to define crevices and depth. The trick is to maintain a cohesive value range that supports the form, rather than chasing a trendy color combination that cannot hold up under realistic lighting. Shadows and highlights are where color theory meets atmosphere. Highlights on metal surfaces aren’t just white patches; they carry subtle color from the surrounding environment. A chrome surface reflects a spectrum that includes the warm hues of the sun and the cooler tones of the sky. You can simulate this by tinting white highlights with pale blues or warm yellows slightly, depending on the light source direction. The same principle applies to the glass and windows: the windshield can glow with a cool tint, perhaps a pale blue, which helps separate glass from metal and adds depth. Even the tires benefit from color nuance: a rich, near-black base with a touch of blue or brown in the crevices reads as rubber with mass and texture, while a light highlight along the outer edge can imply curvature and surface moisture, if any. These small color cues—subtle shifts in hue and value—collectively accord a sense of mass, weathering, and energy to the drawing. Texture is the handiest way to convey the tow truck’s function and history. Metallic textures, rubbery tires, and plastic components all react to light differently, and color helps convey those differences. A metallic body invites cool highlights and a broad plane of reflected color, whereas the tires invite deeper, more granular shadows that hint at tread depth and dirt. If you’re depicting a worn vehicle, a touch of rust can be a powerful color story: a muted orange-brown in the joints, where paint has chipped away, communicates age and service life without overwhelming the composition. Dust and grime can be suggested with subdued browns and taupes along the lower panels and undercarriage. The eye reads these textures as color shifts, so you can avoid heavy detailing and still communicate the truck’s rugged reality. When you render the tow mechanism itself—the boom, the winch, and its cable—color becomes a precise instrument to separate metal from rope and to differentiate bending angles and tensions. The cable, for instance, can be lightened with a silvery highlight that deftly contrasts with a darker winch drum and boom, helping the eye follow the line from the hook to the vehicle. Light direction is destiny for a drawing of a tow truck. It governs where you place highlights and where shadows will ground the form. A late-afternoon sun tends to cast long, warm shadows and produce a stronger, more dramatic color cast on metal, which makes the chrome warmer and the body cooler by contrast. A mid-morning sun creates crisper, cooler reflections that sharpen the shapes and accentuate the geometry of the cab and chassis. In practice, you can stage your color shifts by choosing a single light source and letting the palette carry that temperature through the surface. The base gray becomes the stage for a chorus of color interactions: the yellow warning stripe, a blue-tinted highlight on the chrome, a rust-orange hint in the joints, and a deep black for the tires and underbelly. The result is a coherent, believable vehicle with a color story that supports its form and function rather than disguising its mechanical truth. The page can benefit from a strategic, restrained palette. A limited set of core colors—cool gray, steel blue, bright yellow, warm orange or red, and black—can be expanded with tiny variations without overwhelming the composition. This keeps the drawing readable at small sizes while enabling you to push depth and atmosphere when you zoom in. When you feel uncertain about color balance, reference real tow trucks under similar lighting conditions. Observing how a professional vehicle reflects light and color in daylight or dusk can navigate you toward choices that feel authentic rather than decorative. For practical sketching, you can visit the Santamaria Tow Truck blog for general sketches and tips that align with the practical approach described here. Santamaria Tow Truck blog. A helpful orientation is to treat color as a unifying thread rather than a separate layer of sparkle. Your mission is to drive cohesion so that the tow truck commands attention for its purpose and presence, not merely its palette. A strong color plan supports composition: it leads the viewer’s eye to the winch area and the tow arm, then back along the body to the cab and the wheel wells. It makes the subject feel grounded in a real world with weather, light, and movement. As you practice, you’ll develop a sense of when to reduce saturation and when to push it for emphasis, and you’ll learn to balance the allure of color with the necessity of form. The chapter on color theory is not a detour from the mechanics of drawing a tow truck; it is a crucial set of instruments that, when used with care, elevates your depiction of a hulking, hardworking machine into a believable, carryable image that viewers can emotionally connect with. External resources can deepen your understanding of color and form. For further reading on how color renders mechanical subjects, consult the education resources from the Society of Illustrators: https://www.societyillustrators.org/education. In addition, exploring foundational tutorials in color application, light, and metallic rendering can sharpen your technique and give you additional approaches to achieve realistic outcomes in your tow-truck drawings. This blend of theory and practice—paired with careful observation of real-world lighting and surface interaction—will help you consistently produce tow-truck drawings that feel both credible and visually compelling.
null
null
Final thoughts
Drawing a tow truck is a rewarding endeavor that extends beyond mere artistic practice. By understanding the step-by-step approach, recognizing vehicle proportions, detailing essential features, applying color theory, and avoiding common missteps, you will strengthen your skills and create impressive illustrations. Whether you’re a local driver looking to enhance your understanding of tow trucks, a property manager needing accurate representations for communication, or an auto shop wanting to develop a unique brand identity, these insights will empower you to capture the essence of a tow truck gracefully.