
Drawing a tow truck is more than just an artistic endeavor; it’s a celebration of the essential role these vehicles play in our lives, especially for local drivers, auto repair shops, dealerships, property managers, and HOA administrators. This guide will walk you through the process step-by-step, ensuring that you grasp the techniques needed to create a recognizable and detailed representation of a tow truck. Each chapter builds on the last, starting with the basic outline and moving to intricate details, mechanics, and finishing touches that bring your artwork to life.
Tow-Lines and Turning Points: Crafting a Basic Tow Truck Outline with Confidence
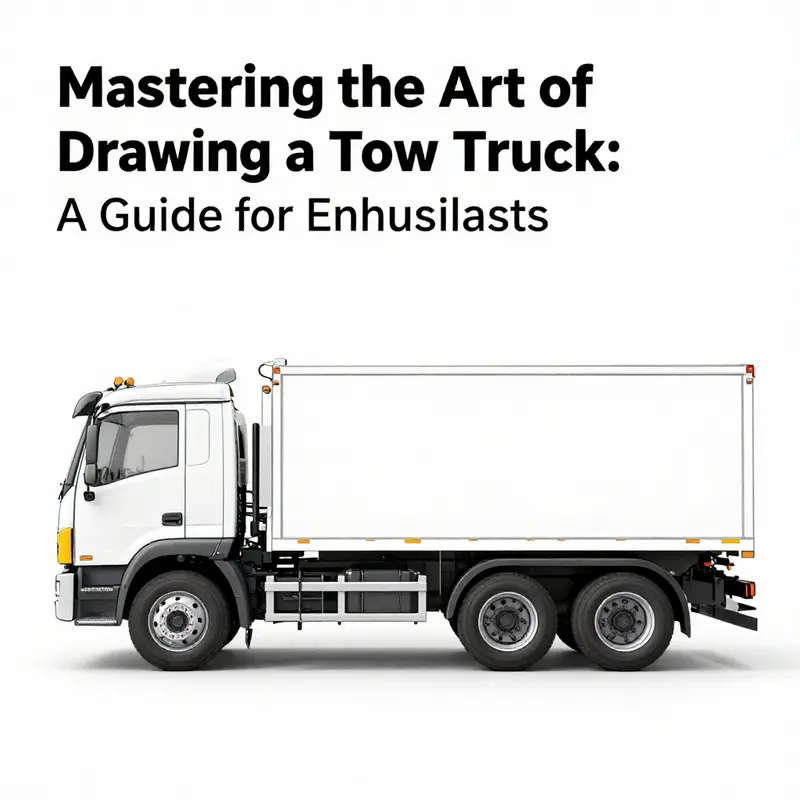
A tow truck is a machine built for leverage, reach, and control, and that exact logic translates beautifully onto the page when you draw it. The goal isn’t to copy every bolt from a real-life rig but to capture the essential silhouette—the way the cab sits atop a sturdy chassis, how the tow arm climbs from the back, and how the wheels carry the weight of the whole machine. When you approach the drawing with patience, you don’t need to chase every intricate detail. You start with a few simple forms, then you refine them into a believable shape. The process mirrors how a tow operator thinks about a vehicle in action: assess the structure, determine the critical components, and align everything so it feels sturdy and useful. For beginners, the charm lies in turning a few basic blocks into a recognizable vehicle that can lift a real car off the ground in your imagination. As you sketch, you’ll notice that proportion is the quiet backbone of the drawing. If the cab is too small or the tow arm too short, the whole image loses balance. If it feels off, adjust the relative sizes, and suddenly the form sits correctly on the page, ready to be inked and shaded. In this approach, you’re not just drawing a tow truck—you’re translating a working machine into a collection of shapes that convey its purpose at a glance. The steps here weave together into a single, continuous flow rather than a checklist of isolated tasks. You begin with the main body and cab, move to the wheels, then introduce the tow mechanism, and finally bring the whole thing to life with light, shadow, and finishing touches. The trick is to see the tow truck as a composition, not just a vehicle: a long, solid base supporting a compact cabin, a heavy-duty arm reaching from the rear, and the interplay of dark tires against a lighter body. This perspective helps you maintain consistency as you add details and work toward a clean, confident outline. Step by step, the drawing matures from rough geometry to a defined silhouette that communicates function as clearly as it does character. If you want a quick reference as you go, picture the line of the chassis as a foundation—then build the cab above it like a house on a solid platform. The tow arm, a crucial feature, anchors the back end and establishes the machine’s purpose within the scene. The process rewards you not with a perfect replica but with a convincing, ready-to-paint plan that captures the essence of a tow truck in action. For additional inspiration or different angles, the idea is to practice with simple views first, then experiment with variations once the basic outline feels reliable. A side profile is the most approachable starting point, as it gives you a clear reading of proportions and the logic of the arm’s placement. As you move toward more complex compositions—three-quarter views, for example—you’ll begin to see how the same core shapes translate into different perspectives. This continuum of practice makes the challenge approachable rather than intimidating. The method described here is deliberately adaptable: you can scale the size of the cab, lengthen the tow arm, or change the wheelbase to explore different tow trucks, from compact rescues to heavy-duty rigs. The key to staying grounded during this exploration is to keep returning to the core shapes—the long rectangle for the body, the smaller rectangle for the cab, the vertical lift of the tow arm, and the four-wheel arrangement beneath. When you’ve drawn the basic outline, you’ll often feel a sense of relief settle in as the major proportions read correctly. The fun then becomes about precision: defining the windows, lights, grille, and mirrors in a way that reads clearly at a glance. Imagine the windshield as a trapezoid, angles that read as glass and give the cab its forward motion, and consider adding a shirt-sleeve line along the roof to imply a slight slope that modern trucks frequently exhibit. Small details—like a door line on the side and a neatly placed side mirror—are the breath of life that makes the drawing feel intentional rather than generic. The wheels anchor the vehicle to the ground, so their size, placement, and shading carry weight. Large circles with inner circles as hubcaps provide the sense of depth needed for a confident, three-dimensional appearance. Connecting the wheels with axles and adding a few short suspension lines beneath the chassis adds realism without complicating the drawing. When you begin to draw the tow arm, you’re stepping into the very heart of the vehicle’s function. Start with a thick, angled arm rising from the rear of the chassis, moving backward and slightly upward as it reaches toward the middle of the page. At the end, sketch a hook or winch mechanism—think of a small circle and a curved line or a simple U-shape to convey the pulley and hook that grip onto a vehicle to be towed. If you want to go a step further, draw a thin line or cable tracing from the hook back to a winch drum concealed along the top of the arm or at the base where it attaches to the chassis. This cable is more than decoration; it hints at the real operation of a tow truck, where tension and control are essential. The overall silhouette benefits from keeping lines clean and decisive. Once the main frame is established, gradually darken the outlines with a fine pen or marker, and erase stray pencil marks that clutter the form. The goal at this stage is a clean, readable line drawing. You may notice that some lines can be left slightly lighter to imply different material weights: the steel tow arm might be a touch darker than the cab, while the windows stay translucent by contrast. The shading you apply later will reinforce this sense of material and depth. As you approach the finish line, consider where light would catch the machine. A simple light source from the upper left means the tops of the cab and the upper surfaces of the arm receive the brightest highlights, while the lower portions and the inside curves of the wheel wells stay in shadow. A few quick strokes along the wheel treads and hubcaps give the tires their texture, and a fine line along the chassis can simulate a metal rail or a step that might exist on a real truck. The trick is to layer shading gradually. Start with light coverage to suggest form and then build up to stronger tones where the foil of light would naturally fall away. You want the shading to enhance the three-dimensional feel without turning the drawing into a heavily shaded rendering. The final touches are about balance: you don’t want the arm to overwhelm the cab, nor do you want the wheels to appear as if they’re merely resting on air. A careful distribution of line weight—thicker for the outer edge of the tow arm and chassis, thinner for internal details—helps the whole piece breathe with a sense of mechanical reliability. If you choose to color, keep the palette grounded in the world of trucks. Common tow truck hues include bold cab colors such as red, yellow, or blue, which can be complemented by black tires and silver or gray metal parts. Reflective stripes, perhaps in yellow or white, add a touch of realism and help the vehicle feel legible from a distance. Color can also inform the weight and texture: chrome-like tones for the winch parts, matte finishes for the body, and slightly glossy textures on the windows. If you’re unsure about where to begin with color, start with a simple base that aligns with your preferred mood, then layer in highlights and shading to simulate metallic surfaces and glass. The method described here remains friendly to beginners while offering enough flexibility for more ambitious renditions. The framework is deliberately modular: you can adjust the length of the cab or the proportions of the wheelbase to fit different design ideas, or you can push toward a more detailed depiction by refining the hood lines, adding door handles, and drawing additional tools along the chassis. The practice of aligning everything in a single, coherent outline is the anchor you’ll return to as you tackle more complicated subjects, whether that’s a tow truck drawn from a reference photo or your own imagined vehicle. The beauty of this approach is that each careful line you place nudges the drawing toward a readymade sense of speed and purpose—the sign that you’ve captured not just a truck but a machine built to recover others. As you continue to draw, you may notice that your first attempts resemble a simplified schematic more than a fully realized vehicle; that is perfectly natural. The trick is to keep refining, letting your eye compare each element to the others until you feel the proportions align and the whole composition holds its ground on the page. If you ever question whether you’re ready to move from a basic outline to a more complex version, remind yourself that the most fundamental aspects—shape, proportion, and alignment—remain intact even as you add details. This is the essence of drawing a tow truck: a steady buildup of simple, robust forms that culminate in a convincing representation of a recovery machine in action. For readers seeking further practice or different vantage points, there are many approachable, beginner-friendly guides that echo the same principles. A helpful resource you can consult is the Santa Maria Tow Truck blog, which gathers practical tips and community-made drawings for readers who want another human-scale perspective on these sturdy vehicles. Santa Maria Tow Truck blog Beyond this, remember that the focus on proportions, basic shapes, and measured lines will pay off across a wide range of mechanical subjects. If you want a structured, step-by-step reference with clear visuals that complement the approach described here, a detailed, image-rich guide from a well-known craft site offers valuable illustrations and explanations you can compare against your own sketch. The Spruce Crafts provides such a resource, walking through an approach very similar to the one outlined in this chapter and offering practical tips for beginners who want to translate a tow truck from concept to line drawing. For a detailed, visual step-by-step, see The Spruce Crafts guide: https://www.thesprucecrafts.com/draw-a-tow-truck-4169870
null
null
Tow Truck Anatomy in Motion: Sketching the Arm, Winch, and the Hidden Mechanics
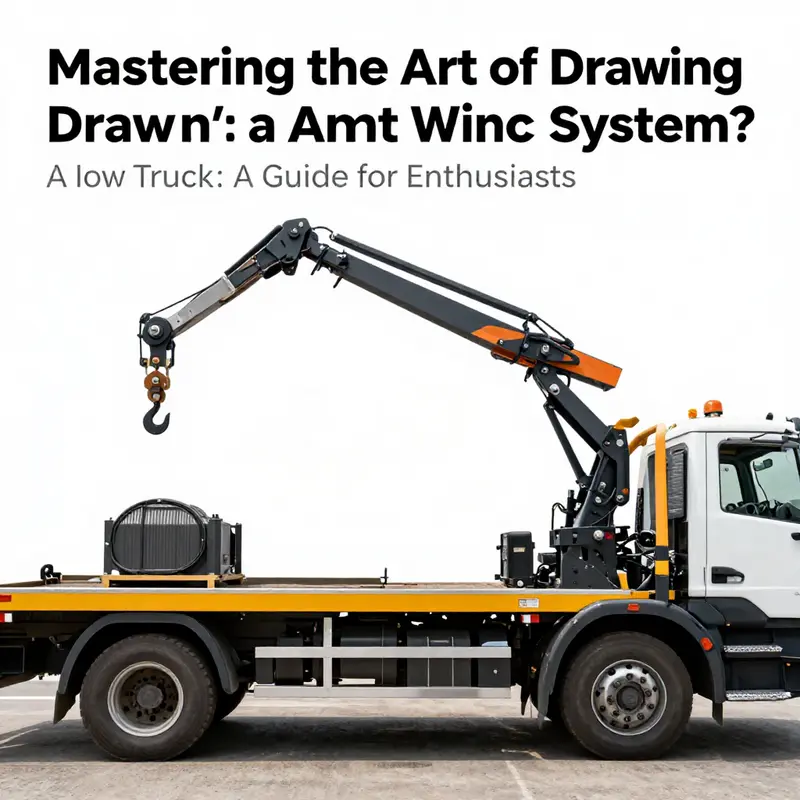
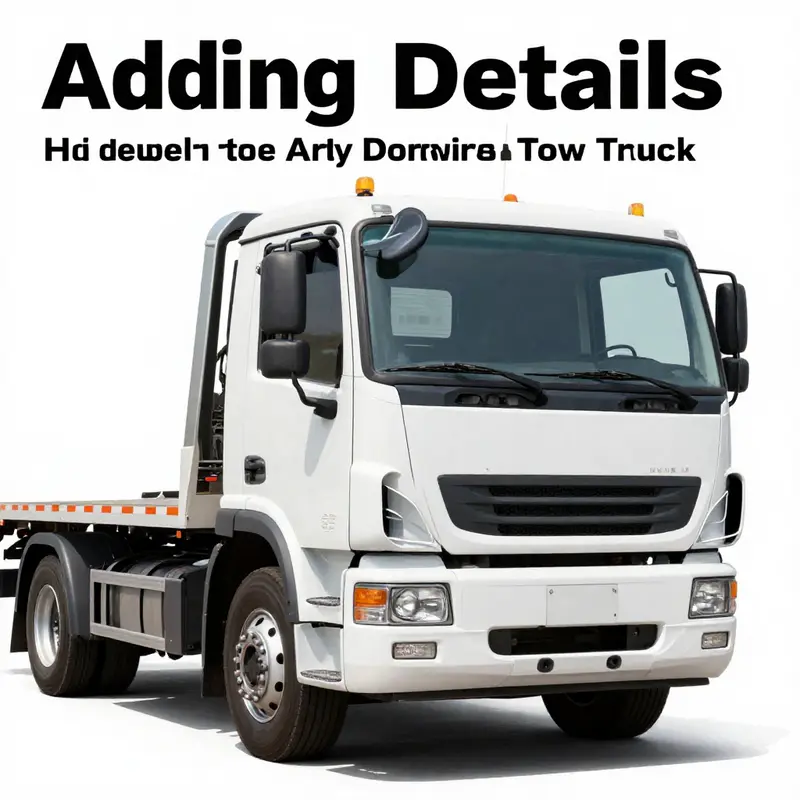
A tow truck’s most defining gesture is not its cab or its wheels, but the arm that rears up, threads a cable through a winch, and reaches out to lift another vehicle. When you draw that mechanism, you are tracing both its physical heft and its practical purpose. The arm and winch are designed to articulate with balance and precision; capture that balance on the page and you communicate the engine’s intent without ever turning a single gear. Start with the big idea: the tow arm is a rigid, often hydraulic scroll of metal that pivots in relation to the truck’s rear, a lever that translates weight into controlled motion. From there, the rest of the drawing follows as a natural extension of this central relationship. Think in terms of proportion, perspective, and the way light plays across metal surfaces, and your line work will begin to breathe with the same confidence you see in the real machine.
The main boom, the long, sturdy beam that forms the backbone of the arm, reads first in your sketch. It should feel substantial, almost like a column of strength that could bear the weight of a car being lifted. In a simplified drawing, start with a thick, rectangular core tapering slightly toward the tip. The perspective matters: if you’re rendering the arm from a three-quarter rear view, the portion closer to the viewer should read slightly larger, while the farther segment finds a subtle decrease in width. This is not just about a straight line; it’s about modeling a mass of metal that has weight and endurance. Think of the boom as two planes: the outer face catching light and the inner edge that invites a hint of shadow. Those planes help you establish the arm’s volume even before you add the details that reveal its function.
Where the arm meets the truck is a hinge, a pivot point that anchors the boom to the chassis and allows it to tilt, extend, and retract. Don’t rush this junction. In life, the pivot is where forces meet: gravity, hydraulic pressure, and the operator’s intent. On paper, you translate that by giving the base a defined, robust connection. A short segment of darker shading along the base suggests a pocket or housing where the hydraulic cylinder hides. Around this area, draw a few straight lines that imply brackets and mounting plates. These are the quiet heroes of the drawing: small, precise components that keep big motions controlled. A couple of bolts or brackets visible along the edge reinforce the sense of a system built to handle repetitive use and heavy loads.
As the boom extends, you’ll likely want to hint at the hydraulic system that powers its movement. In real life, hydraulic cylinders push and pull the arm by pushing pistons inside polished sleeves. In your sketch, the hydraulic cylinder is the clean, functional contrast to the hard geometry of the boom. Represent it with a cylinder-like shape aligned with the arm’s axis, perhaps slightly offset to suggest its role as a driver of motion. A single line to indicate a rod in motion can signal extension; two parallel lines can imply the cylinder housing. If you want a touch of realism, add a small connection where the rod attaches to the boom and another where the other end of the cylinder attaches to the truck. These attachment points are critical in conveying how the arm translates force into movement. Keep the shading on the cylinder consistent with the direction of your light source—metal often reads as a mix of bright highlights and mid-tone reflections, with a crisp edge where you imagine a machined surface meeting air.
Beyond the main arm, the winch assembly is the storytelling center of the mechanism. The winch sits at the end of the arm, typically on a rotation-friendly drum that winds and unwinds the steel cable. In your drawing, the winch is a compact cylinder with a slightly domed cover or a motor housing visible at the outer edge of the arm. The drum itself is a circle or cylinder threaded with a thin line to suggest the cable wrapping around it. The cable, when visible, should read as a slender, taut line that leaves the drum and travels toward a target—perhaps the implied hook of a failed-to-double-back chain. At the extreme end, the hook is a small, rounded form. It’s tempting to make the hook too large; keep it proportional to the drum and the thickness of the cable. The moment you establish a believable scale for the drum and the cable, the viewer’s eye will understand the mechanical arc that governs the entire gesture of lifting and towing.
The cable itself is more than a line. It’s a thread of weight and resistance, a suggestion of tension. In a clean drawing, you can portray the cable as a single, uninterrupted line with a slightly heavier weight near the drum and a taper as it exits toward the vehicle. If you want to imply movement without animating the scene, you can show a segment of slack just where the cable leaves the drum, then tighten as it runs toward the hook. Subtle curves in the cable can imply the arc of the approach as the arm angles in space. If your aim is a more dynamic composition, depict a portion of the cable with a gentle S-curve to communicate a moment of exertion or a shift in load; however, avoid overcomplicating the line—clarity remains the aim.
Equipment like the hook, the chain attachment, and the fasteners on the winch drum should carry their own sense of tactile presence. The hook typically reads as a clean, rounded form with a sharp inward bend to accommodate the cable. A small latch or safety catch can be hinted at with a thin line or a tiny notch. A chain attachment point, if visible, can be represented with a linked piece—think of a short chain hanging slightly slack from the drum or pulling taut toward a distant anchor. Small, careful strokes for the chain links help to differentiate the chain from a smooth cable, reinforcing the mechanical realism of the scene without overwhelming the composition with detail.
The arm’s mechanics are not just about moving parts; they convey weight, balance, and reliability. To emphasize these qualities, include the hydraulic cylinders and pistons as supporting elements, especially where the arm folds back onto the chassis. The cylinders should appear slightly recessed, with shading that suggests a rounded, metallic surface. The lines that define the pistons can be crisper and darker than those that outline the arm to hint at their role as active components. Consider adding a few small lines around the bases of the cylinders to suggest the presence of seals and joints. These tiny cues are easy to miss in a quick sketch, but they add up to a sense of real engineering, the kind that makes the arm look ready to lift with controlled, deliberate force.
As a final layer, you can introduce the broader framework that supports the arm. Bolts, brackets, and latches are the quiet language of a heavy-duty tool. A series of small, evenly spaced dots or short dashes along a bracket can imply screw heads; a subtle, darker line along a bracket edge can communicate a seam where metal parts meet. Don’t crowd these details; the goal is not to show every nut and bolt but to let the viewer sense structure. A light wash under the arm and along the base of the boom can ground the mechanism, establishing a sense of contact with the truck and the ground. If you’re coloring, metal tones—steel gray, brushed aluminum, or a cooler blue-gray—will heighten the sense of machined surfaces. Allow reflective highlights to play across the edges of the arm and the winch, then soften the shadows in the recesses where parts overlap.
Bringing the tow arm and winch into a credible relationship with the rest of the vehicle requires a careful eye for proportion and alignment. The cab, the chassis, and the rear surface where the arm rises should all share a consistent axis in your drawing. If the arm appears to be bending away from the truck, check your perspective and correction lines. A little handful of construction lines can help you maintain the hinge location, the axis of the winch drum, and the alignment of the arm with the truck’s rear. When you refine your shading, let the light source define the planes of the arm as well as the sides of the winch and the cylinders. This approach keeps the mechanical feel intact while producing an image that is readable from a distance, which is essential for a drawing that aims to communicate function as clearly as form.
To connect the chapter to the broader world of towing as an art, a quick note on where to look for broader context can be helpful. For a broader look at towing equipment in action, see the Santamaria Tow Truck Blog. This resource can offer practical examples of equipment used in real-world settings and might spark ideas about how to translate three-dimensional objects into two-dimensional drawings. The blog link provides a useful reference for anyone who wants to understand how such machinery operates in the field and how artists can reflect those operations on paper. Santamaria Tow Truck Blog
In practice, the key is to balance study with simplification. You don’t need to render every bolt or every piece of paint; you need to convey the arm’s proportion, its range of motion, and the reliability implied by its construction. Start with a stronger, clearer silhouette of the arm against the truck. Then layer in the winch as a focal point at the end of the arm, letting the cable and hook speak to the action this machine performs. Finally, bring in the supporting elements—the cylinders, the brackets, bolts, and the subtle shifts of light across metal surfaces. In time, the drawing becomes not just a static image but a narrative of function, weight, and intention.
The practice of drawing a tow truck’s arm and winch is, at its heart, a study in honest observation. Watch how the real system moves, note where the lines stay clean under load, and notice how the geometry narrows or expands as the arm angles. Translate those observations into lines that feel purposeful and robust. Your pencil becomes a tool that communicates the same sense of safety and capability that a real operator relies on when a vehicle needs rescue. If you keep the proportion true, the arm’s length, the join points, and the winch’s scale will do the heavy lifting for you, even before you add the shading that finally gives the drawing its weight.
As an additional resource for visual guidance, you may find inspiration in the visual steps from other beginner-friendly tutorials. For a well-regarded reference that complements this discussion, you can consult the external guide linked here: How to Draw a Tow Truck – Pinterest. This reference offers approachable demonstrations of the arm, the winch, and the overall structure that can help you see how others translate mechanical forms into line and shadow.
In the end, your drawing is a dialogue between structure and motion. It asks the viewer to imagine the force inside those metal members, to feel the tension of the cable, and to sense the confidence of a machine built to restore order on the road. With patient observation, careful linework, and thoughtful shading, you can render a tow truck arm and winch that feel both accurate and alive. If you’ve followed the general sketching approach described here, your arm will look ready to lift, your winch drum will glimmer with metallic shine, and your entire composition will promise the strength and reliability that define this essential piece of rescue equipment.
Tow Lines and Turning Wheels: A Fluid, Colorful Guide to Drawing a Tow Truck
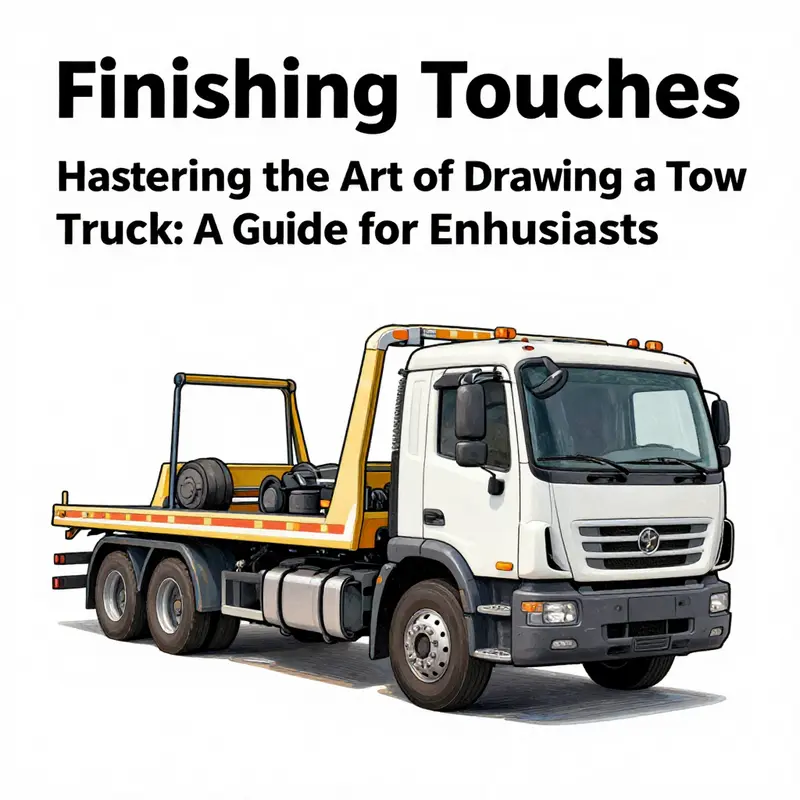
Drawing a tow truck is more than tracing a machine on a page; it is a practice in translating function into form. A tow truck is built around a few essential ideas: a sturdy cab, a long frame, and the heavy lifting arm that dominates the rear. Start with those ideas, and the rest falls into place with clarity. The approach is forgiving, too. Begin with simple shapes and gradually layer in detail, much as a mechanic would build a repair from the ground up. The key is keeping proportions coherent so the cab feels grounded, the arm reads as capable of reaching, and the wheels anchor the overall silhouette. Color then becomes a language of its own, signaling stance, function, and character without shouting. Begin with the silhouette, the quiet backbone of the drawing. Picture the tow truck as two primary masses: a rectangular cab toward the front and a longer, flatter chassis that follows. The cab is the anchor; it suggests the driver’s point of view and provides the recognizable shape that says truck at a glance. Think of drawing the cab as sketching a slightly elongated rectangle. Place a wider, shorter rectangle beneath it to form the chassis, giving stability and heft. The rear of the chassis is where the towing mechanism rises, so imagine a vertical rectangle at the back that acts as the tower for the winch and boom. This vertical presence is not only a structural detail; it is the silhouette that communicates the job at a glance. With the basic geometry in place, shift attention to the cab’s personality. Add a smaller rectangle perched on top for the driver’s compartment to create a neat separation between roof and body. A slanted windshield can be a trapezoid to give the front a dynamic line. Side windows can be added as simple rectangles, and a couple of rounded headlights nudge realism forward. A simple grille—an elongated rectangle or rounded shell—below those lights anchors the face of the truck. Don’t neglect the door: a small line or rectangular panel on the side adds depth, while a mirror projecting outward helps the eye read the vehicle as a working machine with a driver’s in control. The tow arm is where the engineering becomes visually dramatic. From the top of the rear chassis, draw a thick angled arm that sweeps backward and upward. Its bold, mechanical presence should feel heavy enough to lift a load. At the end of the arm, place a hook or winch mechanism. A small circle with a curved line, or a simple U-shape, reads as a winch drum when paired with a short cable that can extend back toward the chassis. If you want extra realism, sketch a thin line from the hook back to the winch drum. This cable, though delicate in appearance, conveys the tool’s capability when drawn taut and slightly curved, catching the light to hint at its metallic surface. Wheels anchor authenticity. A tow truck needs four wheels; place two wheels beneath the front edge of the cab and two beneath the rear portion of the chassis, ensuring they align with the length of the truck. Use circles with smaller inner circles for tires and hubcaps, and connect the axles with straight lines to suggest a solid chassis. Subtle suspension lines or springs drawn just below the body hint at the vehicle’s ability to ride over rough terrain and weight shifts. The wheel wells should hug the tires slightly. As you refine, move toward details that tell the story of a working tow truck. A pair of headlights near the front, a grille, and the cab’s windows create the vehicle’s expression. Inside the side window, a couple of short lines can suggest wipers. The tow arm, now anchored, looks more convincing with a few bolts or rivets along its length and at connection points to the chassis. The winch drum can be hinted at with subtle lines along the tower, and a hook should feel like heavy hardware. If you want, draw faint vertical lines along the trailer’s side to mimic ribbing of metal panels. A door handle, mirror, or subtle seam along the hood can foster realism without overloading the composition. Shading and lighting complete the drawing. Identify a light source and apply soft shadows accordingly. The high, bright surfaces appear along the top edges of the cab and arm, while the lower sides and the inside curves of wheel wells fall into shadow. A careful balance of light and shade helps the arm read as a three dimensional form rather than a flat shape. The tires invite attention: shading around the outer edge can give the impression of curvature, while a lighter rim shade emphasizes the hubcap’s presence. A subtle highlight along the top edge of the boom communicates metallic reflectivity and that the arm is a machine built to perform precise work. Color brings the scene to life. Classic tow trucks carry bold, high-contrast color schemes; the cab can be red, yellow, or blue, while the frame and tow arm settle into metallic tones. Windows can be blue or tinted to suggest glass; tires are black with gray hubcaps, and the towing cable is often dark or metallic gray. If you want, add diagonal stripes along the trailer’s side in yellow and white to echo caution signals typical of service vehicles. The color choices reinforce the tow truck’s role as a bright, efficient instrument in a busy road scene. As you move between outline, detail, and color, the drawing becomes less about copying a photo and more about translating a functional silhouette into a believable machine. Start with core shapes, check proportions, layer in attitude and weight, then test from a slight distance. If the overall form reads sturdy and the arm reads capable, you have achieved a balance between design and realism. To connect practice to broader learning, consider visual guides that walk through the essential steps with live demonstrations. Look for kid- and adult-friendly tutorials that focus on a tow truck, offering a step-by-step path from basic frame to finished piece. A practical blog or community resource with ongoing vehicle sketches can provide reminders that drawing a tow truck is an iterative process that respects geometry, proportion, and light. The exchange between instruction and practice can help you refine technique and approach new subjects with a clearer plan. In context, place the tow truck within a simple road scene to add narrative energy. A hint of pavement texture, soft horizon, or distant lines suggesting other vehicles helps the drawing read as a moment in motion, even at rest. The arm rising above the chassis becomes a focal point, drawing the viewer’s eye toward the machine’s working core. Summary: begin with a sturdy silhouette that communicates cab and chassis, introduce the tow arm with a confident angle, add wheels and small details, then finish with light, shadow, and color. The result is a cohesive, dynamic interpretation of a working machine. With practice, tracing the steps shape, proportion, detail, shadow, and color becomes a rhythm rather than a rigid rule. The tow truck draws itself as a story of leverage, control, and hands-on work. Further practice can be supported by simple, visual tutorials that walk through the steps with demonstrations. The language of lines between bold geometry and subtle metal curvature is the heart of the lesson, and the process of drawing a tow truck invites you to translate function into a living image that can educate, inspire, and entertain. The chapter you have read plants the seeds; the growth comes when you pick up a pencil and translate the idea into a concrete image. When you practice regularly, you begin to anticipate the sequence: shape, proportion, detail, shadow, color; repeat. Then, the tow truck becomes a steady, enjoyable practice rather than a chore. External reference for further visualization and step-by-step practice: https://www.artforkidshub.com/draw-a-tow-truck/
Final thoughts
By following these structured steps, anyone can create a detailed and recognizable drawing of a tow truck. This project not only enhances your drawing skills but also deepens your appreciation for these essential vehicles. Whether you’re a local driver needing to visualize assistance, a dealership looking to incorporate illustrations in marketing, or a property manager seeking to educate residents on towing services, this guide equips you with the skills to bring your artistic vision to life.